 English
 العربية
 中文(漢字)
 Čeština
 Dansk
Dansk Nederlands
 Suomi
Suomi Français
 Deutsch
 Italiano
 日本語
日本語 ಕನ್ನಡ
ಕನ್ನಡ 한국어
한국어 Português
 Русский
 Slovenčina
 Español
 Svenska
 Türkçe
Traditional milling is mostly used to mill simple shapes/features such as contours and grooves. The CNC milling machine can process complex contour shapes and features. The milling and boring machining center can perform three-axis or multi-axis milling and boring for machining, molds, inspection tools, thin-walled complex curved surfaces, impeller blades, etc. When selecting the content of CNC milling, the advantages and key role of CNC milling machine should be fully utilized.
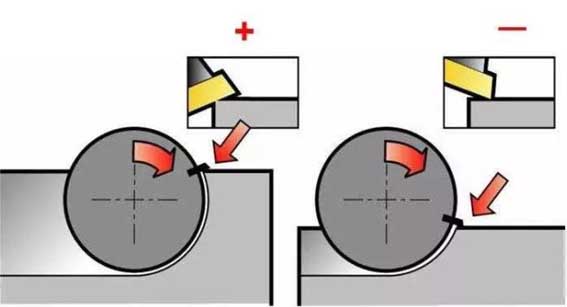
Cutter position setting for down milling
Cutter position setting for up milling
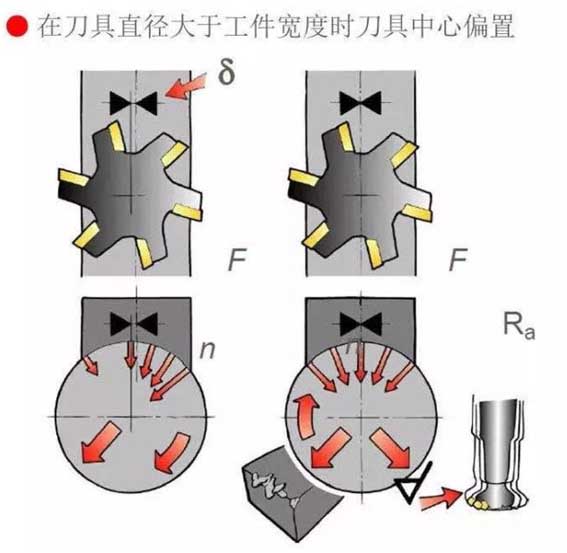
The center offset of the milling tool when the tool diameter is larger than the width of the workpiece
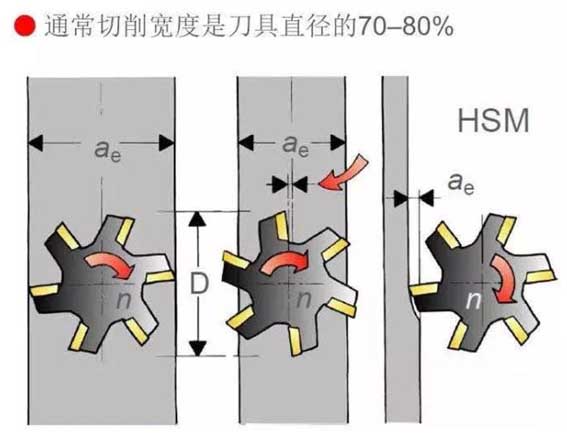
The cutting width is 70%~80% of the tool diameter
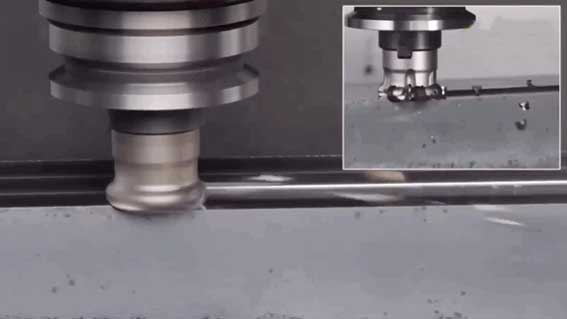
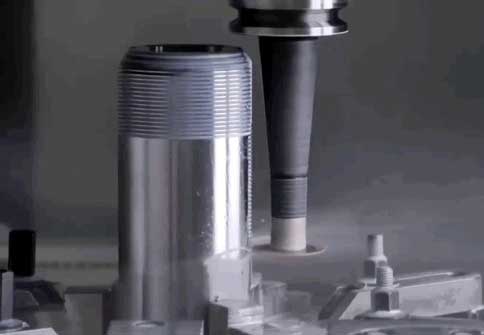
▲Milling processing case
In the actual production of milling processing, it includes many application skills such as machine tool setting, workpiece clamping and tool selection. The following is a brief summary of 4 complete solutions of milling and 17 main points of milling. Each point is worthy of your in-depth grasp.
Please resend the email again
1. Power capacity
Check the power capacity and machine rigidity to ensure that the machine tool can use the required milling cutter diameter.
2. The stability of the workpiece
Workpiece clamping conditions and considerations.
3. Tool overhang
Make the tool overhang on the spindle as short as possible during processing.
4. Choose the right milling cutter tooth pitch
Use the correct tooth pitch of the milling cutter suitable for the process to ensure that there are not too many blades involved in the cutting, otherwise it will cause vibration.
5. The thickness of the milled workpiece
For narrow workpieces or when milling with gaps, ensure that there is sufficient thickness of the blade to take the knife.
Use positive rake geometry indexable milling inserts
Select the appropriate cutter tooth pitch
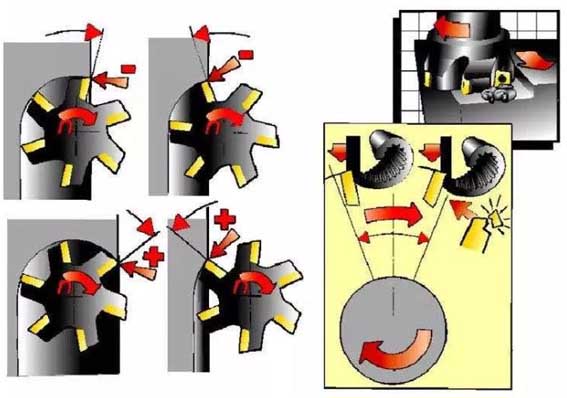
6. Groove selection of milling inserts
Use positive rake geometry indexable milling inserts as much as possible to ensure smooth cutting action and lowest power consumption.
7. Use the correct feed
By using the recommended maximum chip thickness, ensure the correct feed of the milling insert used to achieve the correct cutting effect.
8. Cutting direction
Use down milling as much as possible.
9. Part considerations
The material and configuration of the workpiece, and the quality requirements of the surface to be processed.
10. Material selection of milling inserts
Select the geometry and material according to the type of workpiece material and application type.
11. Vibration-damped milling tools
For longer overhangs that are more than 4 times the tool diameter, the vibration tendency becomes more obvious, and the use of vibration-damped milling tools can significantly increase productivity.
12. Entering angle
Choose the most suitable entering angle.
13. Milling cutter diameter
Choose the correct diameter of the milling cutter according to the width of the workpiece.
14. Positioning of milling tools
Position the milling cutter correctly.
15. Cutting in and out of milling tools
It can be seen that through the arc cutting, the chip thickness when the tool is retracted is always zero, which can achieve higher feed and longer tool life.
16. Coolant
Use coolant only when deemed necessary. Generally, milling can be performed better when no coolant is used.
17. Maintenance
Follow tool maintenance recommendations and monitor tool wear.